Data. You hear it everywhere. Data this data that. Some people believe there is Dataism religion with a huge following. However, Data by itself means nothing unless you gain insights from it and adapt and improve accordingly.
How to gain those insights? You need tools to help you to go through large amount of data( there are tons out there). GoogleAnalytics is one of them and it is free 🙌.
When you create any site(be it a blog( like my case)),you would like to know who visited your site, which page has the most views,etc. GoogleAnalytics has a simple interface to see those insights in detail.
Let's jump into it
Step 1: Creating a Google Analytics Property
The absolute first thing we'll need to do for those starting from scratch is to create a Google Analytics Property.
To do that, you'll first need to go to Google Analytics and sign in with your Google Account.
Google Analytics needs Property set up for which it will generate a tracking code. That code is what we need to inject into our projects so GA can track it. Let's get that code.
Before creating a Property, you'll need to create an account WITHIN Google Analytics. You may have few sites,you monitor. Hence this extra account WITHIN GA.
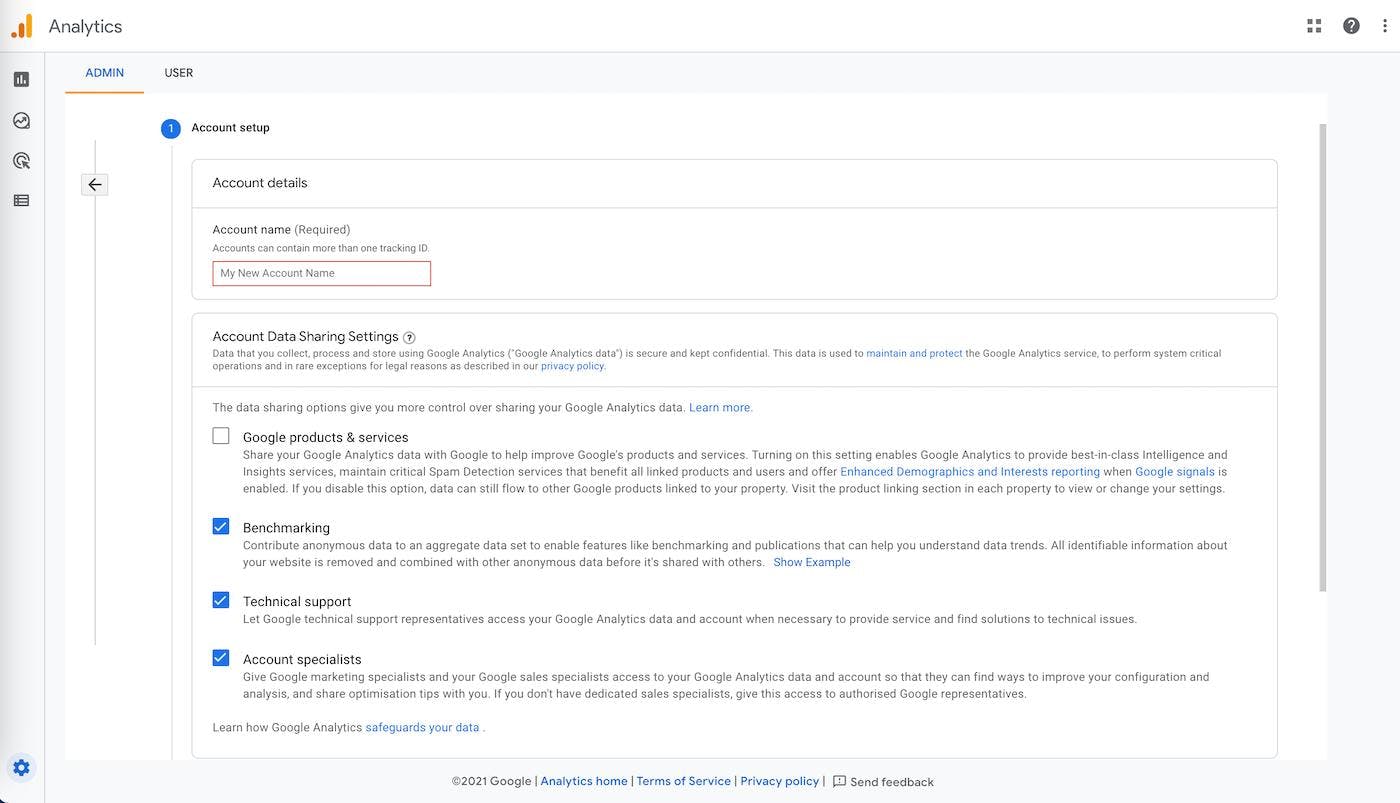

Put in the domain name for better organisation.
The next step will allow you to create a property within your newly created Google Analytics account:
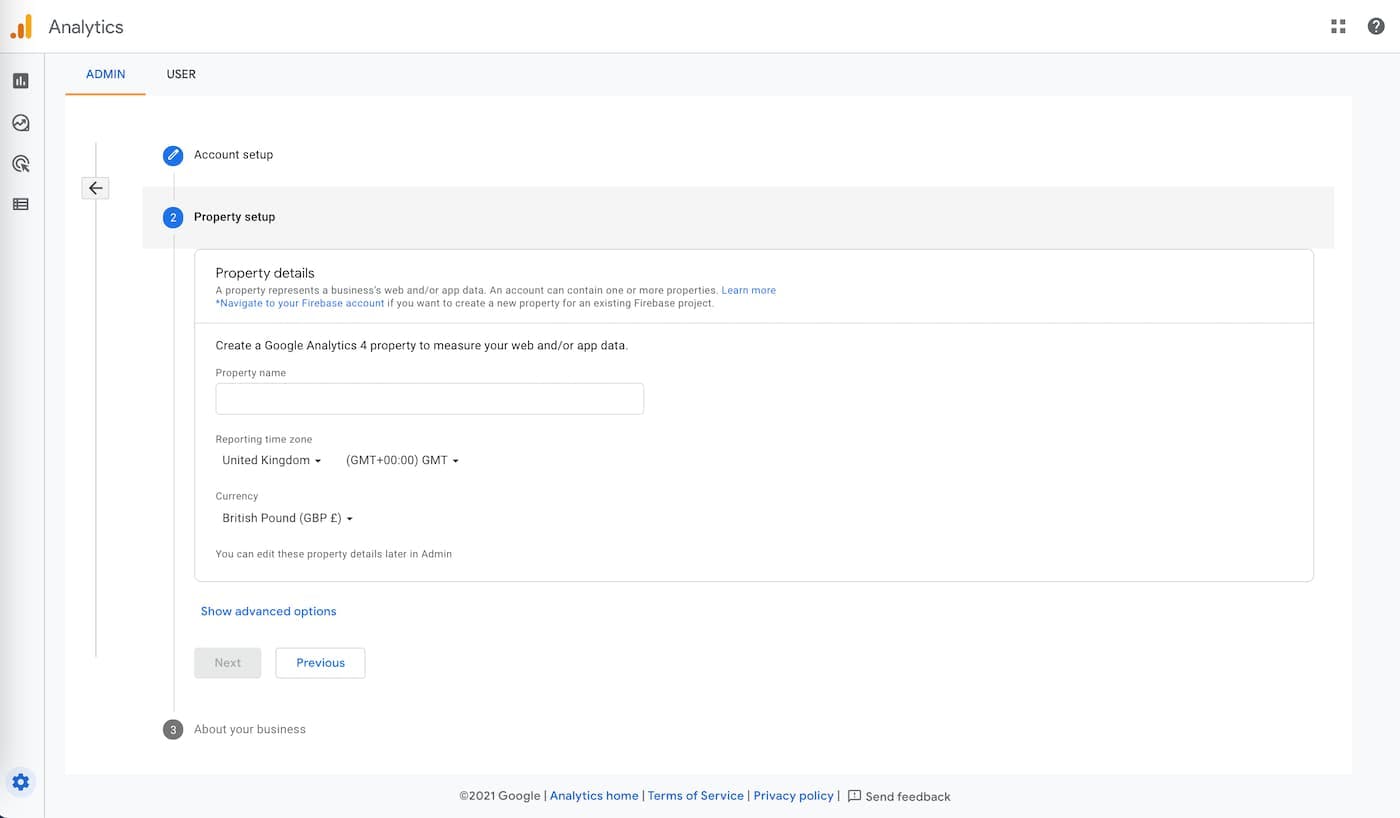
My preferred choice of name is the domain( so it can be linked to some other service Google provides) but you can the property whatever you want.
Now we are almost there at getting our tracking Id ( or how GoogleAnalytics names it Measurement ID). If you followed the steps you should see this :
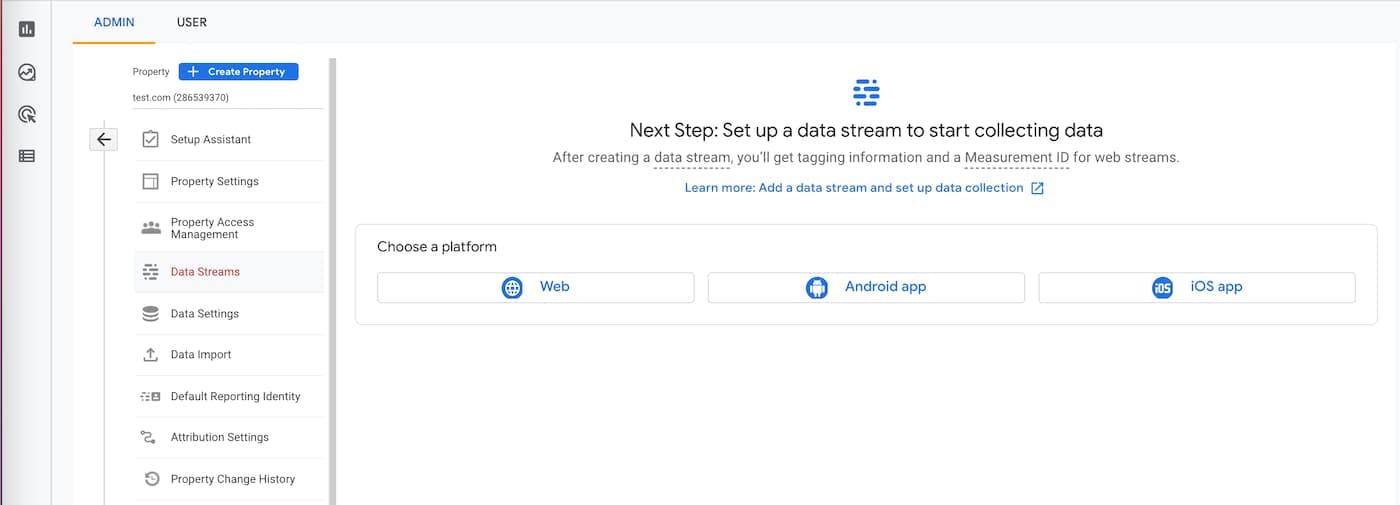
To get data GA needs to know what type of data stream it needs to monitor. In our case it will be a Web Stream.
In next window enter your site's URL and give the stream a name for reference. After doing that we are at the finish line. Click on Tagging Instruction and Add-on new on Page tag.
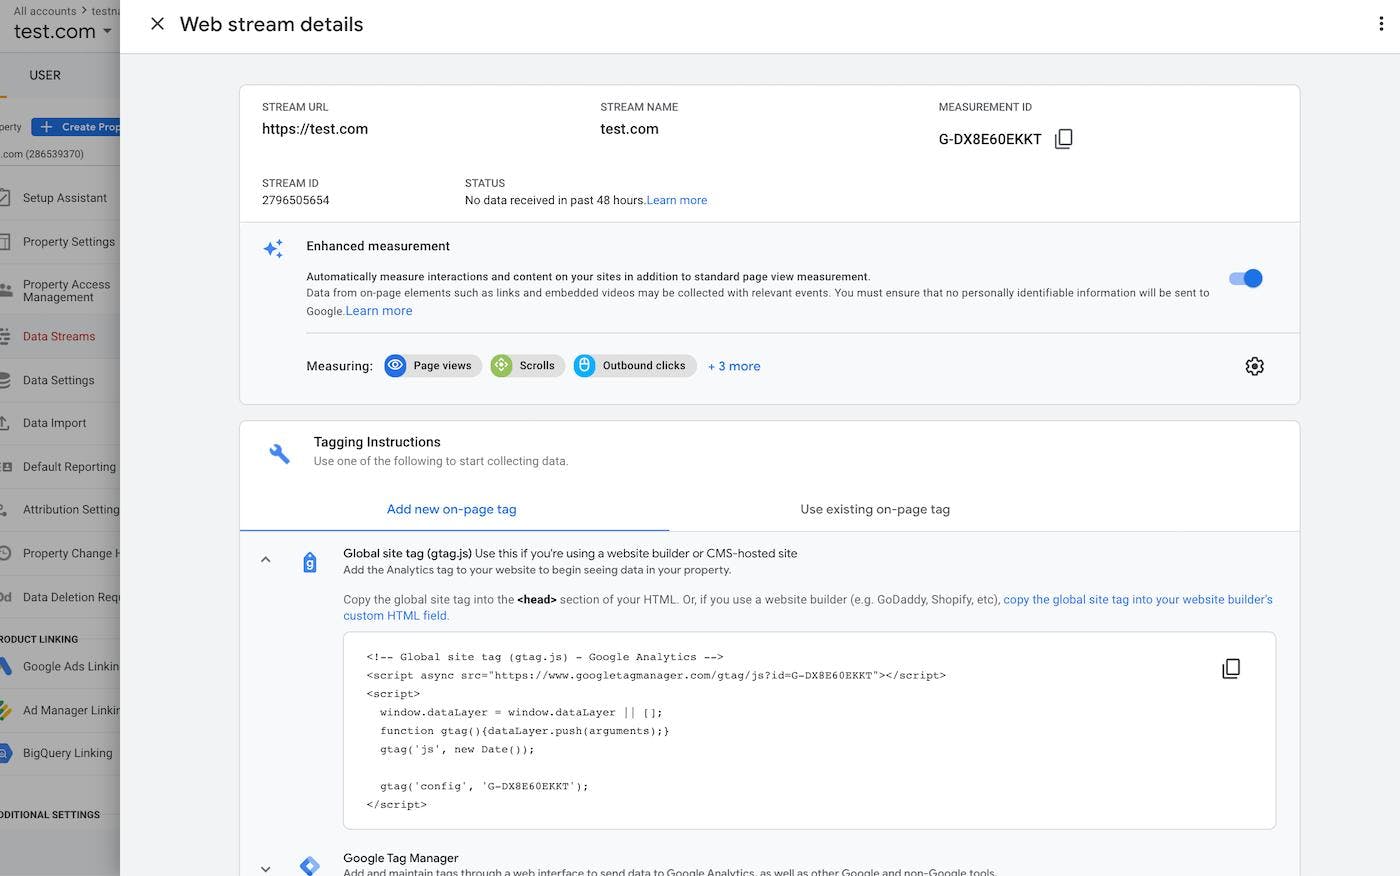
There we have it. In the top right corner,you can see Tracking Code( or as per GA Measurement ID). Leave it open and let's jump into the next step.
Step 2: Setup your Nextjs project
Let's assume you have done it already. You can check out my GitHub repo for the full implementation.
We are going to use the new NextJS feature Script Component. For it to work you will need NextJs version 11.
Step 3 : Inject Google Analytics tracking code into your Nextjs application
Now that we have our Measurement ID (tracking Code), you need to inject and configure Google Analytics' Global site tag (aka gtag) into your browser window as per instruction from GoogleAnalytics.
Previously, you needed to define script tags inside the Head of your Next.js page or create custom _document.js.
Now, you use next/script in the body of your Next.js page. It has client-side functionality that decides when and how to load the remote script based on the strategy.
Let Next.js documentation explain it :
The Next.js Script component enables developers to set the loading priority of third-party scripts to save developer time and improve loading performance.
Websites often need third parties for things like analytics, ads, customer support widgets, and consent management. However, these scripts tend to be heavy on loading performance and can drag down the user experience. Developers often struggle to decide where to place them in an application for optimal loading.
With next/script, you can define the strategy property and Next.js will optimize loading for the script:
beforeInteractive: For critical scripts that need to be fetched and executed before the page is interactive, such as bot detection and consent management. These scripts are injected into the initial HTML from the server and run before self-bundled JavaScript is executed.afterInteractive(default): For scripts that can fetch and execute after the page is interactive, such as tag managers and analytics. These scripts are injected on the client-side and will run after hydration.lazyOnloadFor scripts that can wait to load during idle time, such as chat support and social media widgets.
Let's navigate to our _app.js file and import the Script component at the top
import Script from "next/script";
When we go back to the Google Analytics window we left open there is some instruction on what to inject. Modify to input as below
// ... represents omitted stuff for simplification
import Script from "next/script";

function MyApp({ Component, pageProps }) {
  //...
  return (
    <>
      {/* Global Site Tag (gtag.js) - Google Analytics */}
      <Script
        strategy="afterInteractive"
        src={`https://www.googletagmanager.com/gtag/js?id=XXXXXXXXX`}
      />
      <Script
        strategy="afterInteractive"
        dangerouslySetInnerHTML={{
          __html: `
            window.dataLayer = window.dataLayer || [];
            function gtag(){dataLayer.push(arguments);}
            gtag('js', new Date());
            gtag('config', 'G-XXXXXXX', {
              page_path: window.location.pathname,
            });
          `,
        }}
      />

      <Layout>
        <Component {...pageProps} />
      </Layout>
    </>
  );
}

export default MyApp;
First sub-step done. BUT, there is a big BUT because we are using NextJS which generates SPA(Single page application). NextJs is a React framework after all. What that means is all content gets loaded at the beginning and any subsequent request or route changes get intercepted ( As per standard React). It implements client-side navigation. Google Analytics wasn't originally designed for that. Even though these days has something like Enhance Measurements for Web streams. However,it is still a bit unreliable. So when the page loads GA will track that view but it will not track the change of the routes. We need to give GA help.
To do so, I suggest you create a lib folder where you will put all your code related to third-party libraries and another folder inside called ga for Google Analytics.
Inside your lib folder, create a gtag.js file with two functions: one to log page views and the other events. ( the second helper function is for advanced usage such as tracking the clicks on certain buttons etc)
To get more organised and for future ease create env.local and put your Measurement Id( Tracking code there). It helps with deployment. If you need more info on Environment variables please check an amazing NextJs docs
export const GA_TRACKING_ID = process.env.NEXT_PUBLIC_GA_ID;

// https://developers.google.com/analytics/devguides/collection/gtagjs/pages
export const pageview = (url) => {
  window.gtag("config", GA_TRACKING_ID, {
    page_path: url,
  });
};

// https://developers.google.com/analytics/devguides/collection/gtagjs/events
export const event = ({ action, category, label, value }) => {
  window.gtag("event", action, {
    event_category: category,
    event_label: label,
    value: value,
  });
};
Both helper function will help us track navigation and page views in our app.
Navigate to your _app.js and mirror the code as per below
import Layout from "../components/Layout";
import "../styles/globals.css";
import { useEffect } from "react";
import Script from "next/script";
import { useRouter } from "next/router";
import * as gtag from "../lib/gtag";

function MyApp({ Component, pageProps }) {
  const router = useRouter();
  useEffect(() => {
    const handleRouteChange = (url) => {
      gtag.pageview(url);
    };
    router.events.on("routeChangeComplete", handleRouteChange);
    return () => {
      router.events.off("routeChangeComplete", handleRouteChange);
    };
  }, [router.events]);

  return (
    <>
      {/* Global Site Tag (gtag.js) - Google Analytics */}
      <Script
        strategy="afterInteractive"
        src={`https://www.googletagmanager.com/gtag/js?id=${gtag.GA_TRACKING_ID}`}
      />
      <Script
        strategy="afterInteractive"
        dangerouslySetInnerHTML={{
          __html: `
            window.dataLayer = window.dataLayer || [];
            function gtag(){dataLayer.push(arguments);}
            gtag('js', new Date());
            gtag('config', '${gtag.GA_TRACKING_ID}', {
              page_path: window.location.pathname,
            });
          `,
        }}
      />

      <Layout>
        <Component {...pageProps} />
      </Layout>
    </>
  );
}

export default MyApp;
As you can see from the code above, we are using built-in router and taking advantage of useEffect to track page changes. This way collision between GoogleAnalytics and SPA(SinglePageApplication) is resolved and we can safely track page changes.
Step 4 : Testing and Debugging
Let's get the app going
npm run dev
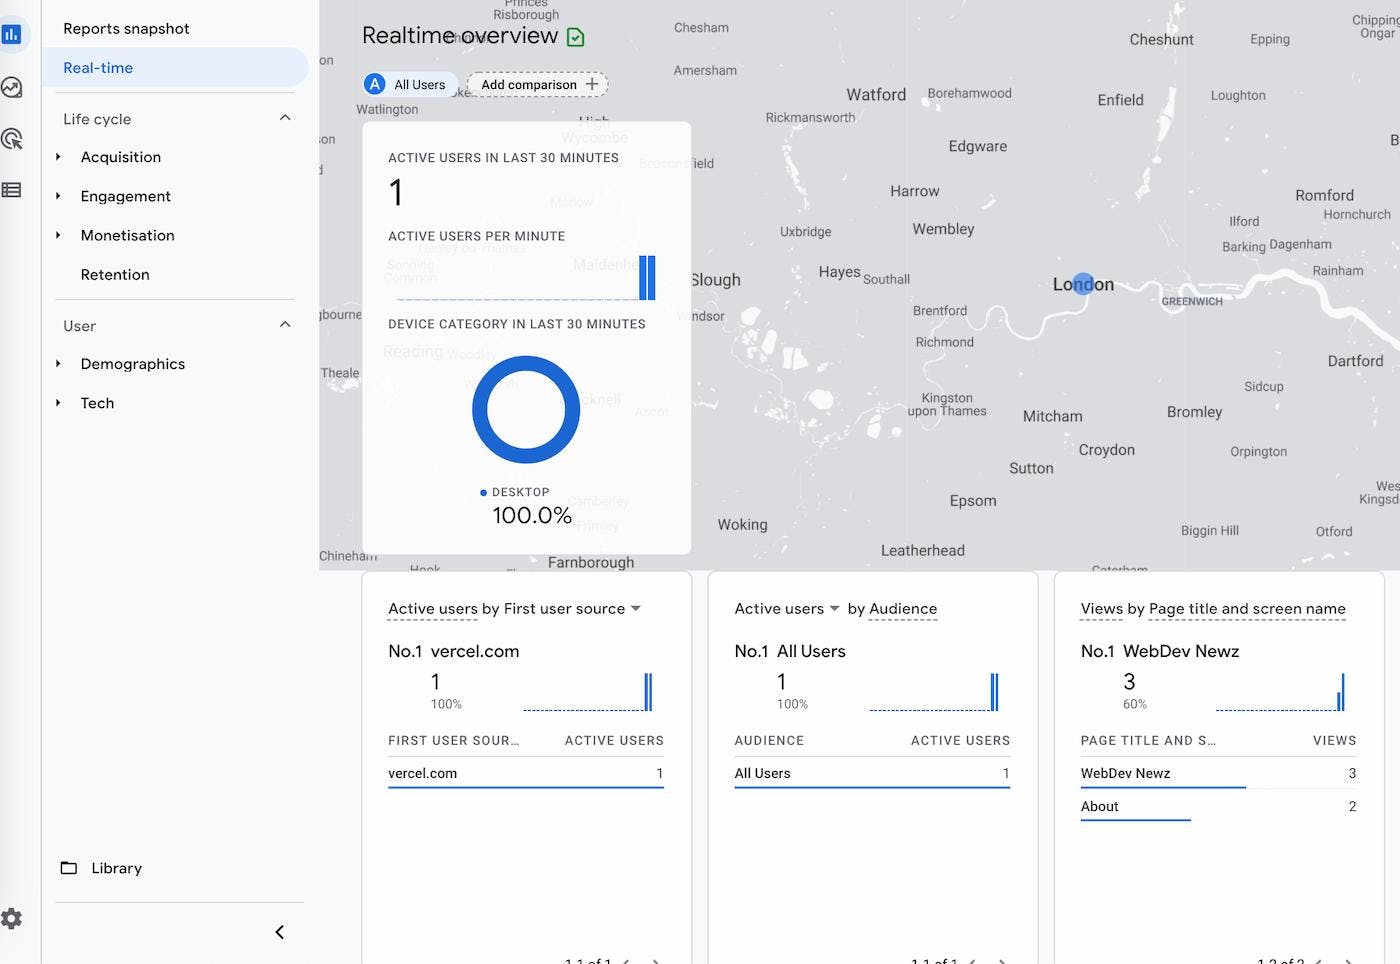
It takes between 24-48 hrs for data to show up in Google Analytics. However, you can check if your tag is working by looking at the Realtime view. Go to your GA account for the site click Reports and then Real-time( sometimes it needs refreshing ). If you see that page is connected.
Alternative for testing the connection is opening up the Chrome Console by hitting the F12 key.
Type dataLayer into the console press Enter to see the events that have been sent by the analytics tag
If you don't see any data in Realtime, another way to test your Google Analytics tag is with the Chrome extension Google Analytics Debugger.
Once installed and turned on, it prints Google Analytics messages to your console making it easy to see what happens behind the scene.
OK folks that's it. I hope this was helpful especially traversing the pitfalls of SPAs with GoogleAnalytics.If you have any suggestions or any feedback do not hesitate to drop me a line.
If you like my content I’m active on Twitter @gajdos81. I tweet about web development, no-code, and low-code hacks to make developer's life easy.